Interactive
Troubleshooting
Guide
Welcome to ITSGA website designed to help you improve and strengthen your troubleshooting skills. Here, you’ll find the guidance and resources you need to solve problems more confidently.Ready to get started?
Start your learning journey by choosing a troubleshooting problem that interests you the most. Focusing on one area at a time will help you build confidence and master each skill step by step.
If you’re experiencing problems connecting to the internet, this guide will walk you through troubleshooting your router step by step.
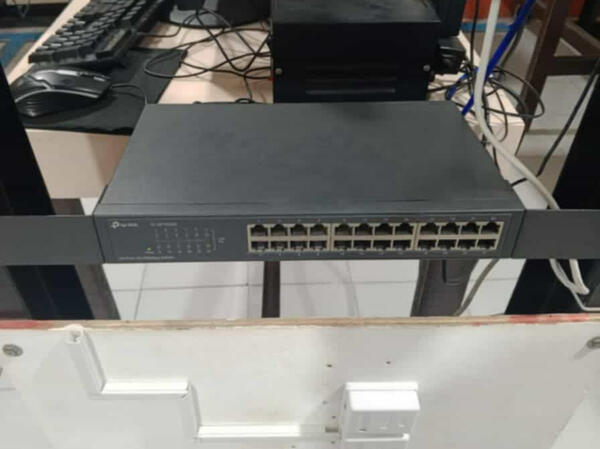
If you’re experiencing connection issues, this guide will walk you through troubleshooting your cables step by step, including those in patch panels, switch hubs, and server-to-client connections.
Follow this step-by-step guide to troubleshoot and resolve common internet issues.
1. Check Physical Connections
Ensure that your computer is properly connected to the network. If you’re on Wi-Fi, check if the device is connected to the correct network. If you’re using a cable, make sure it’s firmly plugged into both the computer and the router.
2. Resetting Router or Access Point/AP
If your internet connection is unstable, restarting your router and access point can often solve the problem.Resetting a router or access point is often necessary during troubleshooting, as it helps clear temporary glitches, refresh the connection, and resolve issues like slow speeds, lost connections, or IP conflicts, ultimately restoring stable network performance.
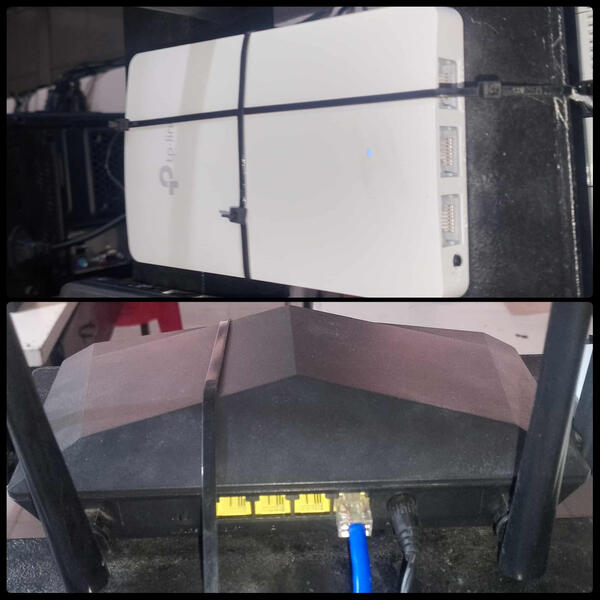
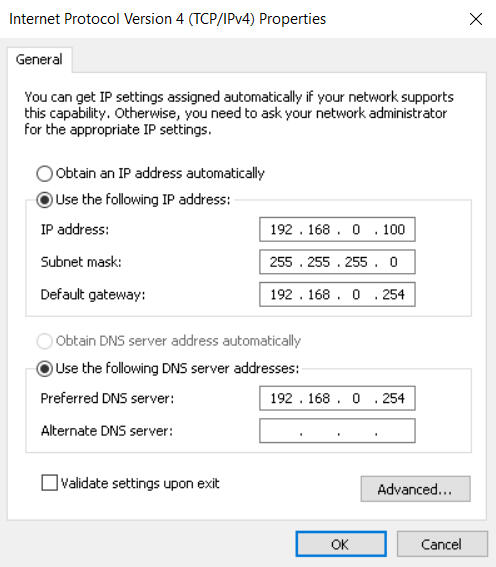
Decide which device you will reset first:If you’re resetting the router, disconnect it from the AP.If you’re resetting the AP, disconnect it from the router.On your computer, go to "Open Network & Internet Settings", then select "Change Adapter Options".Right-click on "Ethernet", choose "Properties", and double-click "Internet Protocol Version 4 (TCP/IPv4)".If you reset the router, make sure IPv4 is set to ‘Obtain an IP address automatically’.If you reset the AP, configure it using the default IP address:
After following this guide, internet connection issues should be a thing of the past. Ready to move on and tackle another troubleshooting challenge?
Follow these steps to troubleshoot your cable issues.
1. Inspect the Cable for Damage
Look closely at the cable. Is the sheath cut, bent, or broken? A damaged cable can interrupt the signal.If that’s the case, you’ll need to create a new cable, but this time, be more careful, because every step matters.
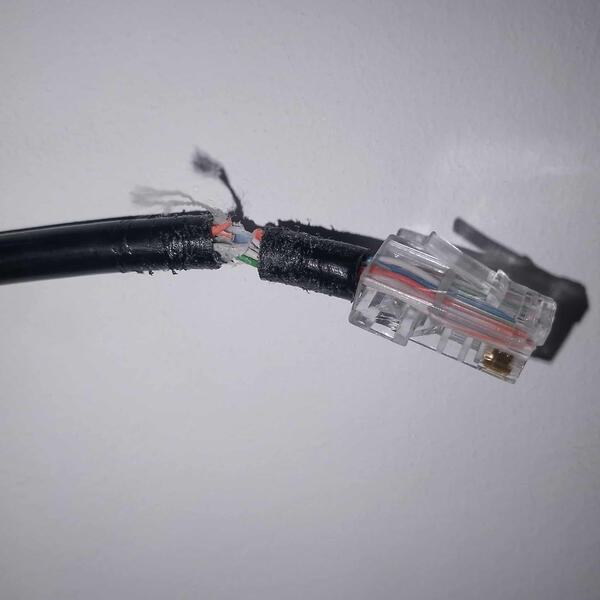
The main causes of UTP cable damage are often due to rodents, poor installation practices, and environmental factors like moisture or heat, issues that are sometimes hard to fully prevent, especially in shared or outdoor spaces, but they can be minimized by using conduit or cable trays, choosing rodent-resistant cables, maintaining proper bend radius during installation, and keeping cables away from sources of water and extreme temperatures.
2. Check the Physical Connection
Make sure the cable is properly plugged in on both ends. Sometimes, a loose connection is the simplest cause of the problem.
3. Test with Another Cable
Swap the current cable with a new one. If the connection works after replacing it, then the original cable is faulty.Always keep a spare cable that you know works properly. You can use it to test whether the issue is caused by hardware or software.
4. Check the Crimping (RJ45 Ends)
Check the ends of your RJ45 connector to ensure they are crimped properly. If there are loose or protruding wires, don’t hesitate to re-crimp it.Always make sure the cable wires follow the correct color sequence (W/O, O, W/G, B, W/B, G, W/Br, Br).
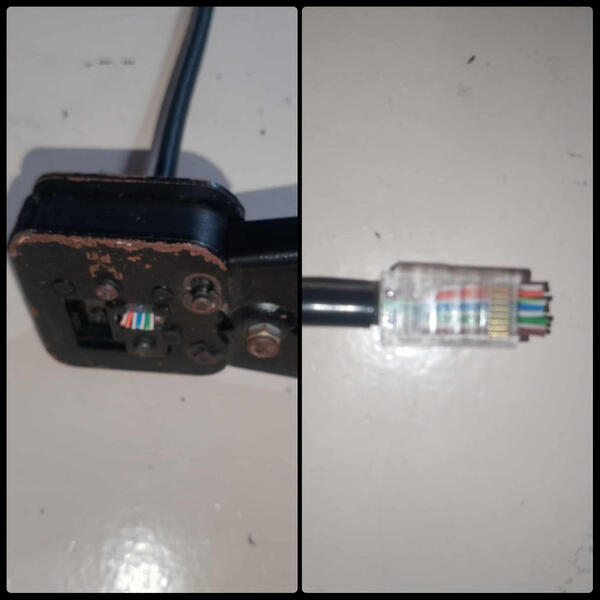
Sometimes, poor crimping of a UTP cable and RJ45 connector is caused by the crimping tool itself, make sure to check if it’s still functioning properly and hasn’t become rusted or damaged. To avoid this, regularly inspect and maintain your tools, store them in a dry place to prevent rust, and replace them when they show signs of wear or no longer produce reliable crimps.
5. Use a Cable Tester/Switch Hub
A cable tester helps confirm if the cable is wired and functioning correctly. If a light doesn’t blink, it points to a specific wiring issue.